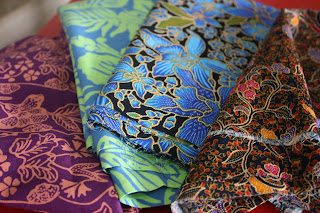
I love all kinds of artisan-y textiles. And of batiks are one of my favorites. So naturally I was excited to have to buy some for Whirls and Twirls projects.
the two on the left are block-printed and the two on the right are batik

Batik is made using hot wax to outline the design and then dyed and hot waxed in layers until the end result of a beautiful mix of colors and designs is achieved. National Geographic has an interesting article about the craft in Malaysia.
Hot wax and a 3-year-old didn't seem like a very good combination, so we followed the directions from That Artist Woman and First Palette for a kid-friendly batik project.
We took inspiration from one of our books this month, My Mother's Garden by Malaysian author and illustrator Emila Yusof. This sweet story has beautiful illustrations of a Malaysian garden.

The Whirl Girl flipped through the pages and chose what drawings she wanted to put on her batik pillowcase - butterflies, flowers, leaves, trees, a little girl, sunshine, rain, clouds, and dragonflies.
Supplies:
- acrylic or fabric paint
- paint brushes
- pencil
- washable glue (the blogs recommended Elmers Washable Blue Glue, but we couldn't find that here so I used the white Crayola Washable Glue that I could find)
- a piece (or multiple pieces) of white or light-colored cloth (I used an old white pillowcase that is now a bright, colorful pillowcase)
Step One: Draw a design in pencil. The Whirl Girl drew some more abstract designs and I did some some more literal interpretations of garden drawings.
Step Two: Trace the designs with the glue. This definitely required some adult assistance. The Whirl Girl moved it while I squeezed.
Step Three: Let it dry. This is the hardest step, because it has to dry for hours. And that's means lots of "is it dry yet?"

Step Four: Get your paint ready. Add water to the acrylic paint so that it isn't too thick. No exact combination, but it should spread around easily.
Step Five: Paint!
Step Six: Let the paint dry. We did this waiting overnight. It was done when we woke up.
Step Seven: Soak the fabric in hot water for 10-15 minutes and then rub off the glue.
Step Eight: Dry it and you're done!
Definitely a lengthy process but worth the end result! A new pillowcase for The Whirl Girl.


Very cool! Nice job Sahana!
ReplyDeleteAwesome pillowcase!! So cute!!
ReplyDelete