Saturday, July 30, 2011

Malaysia donation: Orangutan Foundation International

After reading books about orangutans, and then seeing them in the (semi) wild in Borneo, we were inspired to make our donation this month to an organization that helps orangutans and their habitat.

This was a cause The Whirl Girl could easily understand, especially since she saw how the "uncles" gave food to the orangutans at the Semenggoh Rehabilitation Centre that we visited near Kuching, Malaysia.


The organization that we selected is Orangutan Foundation International. It was founded by Birute Galdikas, a primatologist who moved to Borneo 40 years ago to study orangutans and has been there ever since. For my grown-up book this month, I read her memoir and found her work incredibly inspiring. Just as with our Kenya donation, I liked the idea of giving to an impressive woman that I had just learned a good deal about. Though - full disclosure - her work (and the book) is on the Indonesian side of Borneo, not the Malaysian side. But orangutans don't know the meaning of the national borders on their Bornean home, right?

As a bonus, Orangutan Foundation International offers the opportunity to "foster an orangutan." Basically, with your donation, you can choose an orangutan to support and then are given bio information and a certificate as a thanks. I thought this was a good way to make the idea of a donation more accessible to The Whirl Girl.

So she made a card to send to OFI, or as she said, "the people who take care of orangutans." I printed out a coloring page of orangutans for her to color, as her baby stuffed orangutan looked on (at her insistence).


Then, she "wrote" a note on the inside (and I deciphered it into English script on the opposite side).

And we packaged it up and sent it in the mail to OFI. Looking forward to getting something back about Omry, the baby orangutan that she picked from the website because he was described as the silly one.

Friday, July 29, 2011

Malaysia crafts: Peranakan Beaded Slippers


One of our books this month is The Beaded Slippers, by Adeline Foo, a local author. It offers insight into Peranakan culture, something we've slowly been learning about since moving to Singapore. It is basically a "mixed" culture, most commonly from the marriages of Chinese immigrants and Malay women centuries ago. It is especially strong in on the west coast of Malaysia (especially the cities of Malacca and Penang), Singapore, and parts of Indonesia.

There is a long tradition of handicrafts, especially beading and embroidary. Beaded slippers were commonly handmade by women and worn for weddings and festive occasions.

photo from this site

So we decided to take a crack at making our own - much simpler - slippers. Because The Whirl Girl loves shoes.

It was The Whirl Girl's first sewing project and I took a cue from the Skip To My Lou blog post on making sewing cards for young kids. Only instead of paper, we used felt. There's a fair amount of prep work, before it's time for the kiddo to start "sewing."


Supplies:
  • a hole puncher
  • felt (I used two small square sheets, one red and one purple)
  • beads (bigger than the hole the hole puncher makes, we used some from a Melissa & Doug bead kit that were perfect for little fingers)
  • scissors
  • yarn and scotch tape (or shoelaces)
  • needle and thread (for the adult)

Step One: Cut out the base of the shoes. I used one of The Whirl Girl's shoes as a template.

Step Two: Cut out the top of the shoes, about 1/3 to 1/2 the length of the base.

Step Three: Punch holes in the top of the shoe. Hopefully your hole puncher is sharper than mine! This will be the design for sewing. I tried to make a butterfly and a flower, to mixed results. Can you tell which is which?


Step Four: Prepare the thread. Wrap scotch tape tightly around the end of a piece of yarn. This allows the child to sew without a needle. (Or alternatively, you can use shoelaces, which already have a hard end).


Step Five: Now, finally, time for The Whirl Girl to join in. Sew the beads on, using the holes to go up and down through the felt.

putting the thread through
pulling the thread
threading and attaching a bead
halfway
finished beading

Step Six: I used a regular needle and thread to hand sew the top to the base. The Whirl Girl enjoyed watching "grown-up sewing."

patiently waiting for her slippers to be completed

the final product

They quickly joined her other "dress-up" shoes, a collection from various travels, and some of her very favorite toys.

sandwiched between shoes from India and Malaysia

Do your kids have a shoe fetish? Any fun ones you've collected from your travels?

Monday, July 25, 2011

Malaysia cooking: Pandan Chiffon Cupcakes

Pandan is a common ingredient found in this part of the world. It's used in both sweet and savory dishes. Since The Whirl Girl loves to bake (well, she loves to mix), we decided some cake was in order.
Here's what pandan looks like:

While it's pretty non-descript looking, it has a very distinctive fragrance. It smells a little bit sweet and floral and coconut-y. If you don't live in these parts, you can probably find it at an Asian store, or at the very least, you can likely find pandan paste or flavor there.

There are TONS of recipes for Pandan Chiffon Cakes, a popular way to use pandan leaves. I opted for the following one from a blog, because it had American measurements and the author had converted the recipe to cupcakes which I also needed to do since I don't have a tube pan. It follows at the end of this post.

We could have opted to use the pandan paste instead of making our own pandan juice. But I thought if the whole point was for The Whirl Girl to learn something about Malaysia, then it was a good idea for her to actually see, smell, and touch the ingredient that made the cake Malaysian.

We blended the leaves in the food processor (about 15 leaves) with about 6 TBS of water. Then we pressed the juice out of the paste using a strainer.

It yielded a bright green juice that made The Whirl Girl very excited about making green cupcakes. It turned the batter a color green that reminded me of St. Patrick's Day.

Unfortunately when they came out of the oven, they didn't look very green...
...until we broke them open and found the slight greenish hue.

More importantly, they tasted great and were a big hit here. And with our neighbors too, because as delicious and light as they were, there is no way we could polish off 30 on our own.

Pandan Chiffon Cake (or Cupcakes)

Ingredients
(A)
1 3/4 cup all-purpose flour, sifted
1 Tbp. baking powder
1 tsp. salt
1/2 cup sugar

(B)
1/2 cup vegetable or canola oil
6 egg yolks
3/4 cup coconut milk
1 tsp. pandan paste (I used 1 1/2 tsp of pandan juice that we made from the leaves and 1/2 tsp of pandan paste from the jar)

(C)
6 egg whites
1/2 tsp. cream of tartar
3/4 cup sugar

Directions
Preheat oven to 350'F (175'C).

Combine (A) in a bowl. Stir well to blend. Add (B). Beat with an electric mixer until smooth.

Beat (C) (egg whites and cream of tartar) in a separate bowl until moist peaks formed. Gradually add 3/4 cup sugar, beating until stiff and shiny peaks are formed. Fold 1/3 of the egg whites into the egg yolks mixture, fold to mix and then add the rest of the egg whites. Fold gently but thoroughly, so no white streaks remain. Turn batter into ungreased 10" tube pan (OR into cupcake tins).

Bake for 60 mins (OR 20 minutes for cupcakes) or until a toothpick inserted in the center comes out clean. Invert cake and cool completely in pan. Make sure oven has reached 350 F before putting cake in oven. When cool, loosen the edges and shake pan to remove.

It made about 30 cupcakes.

Sunday, July 24, 2011

Malaysia crafts: Rhinoceros Hornbill paper craft

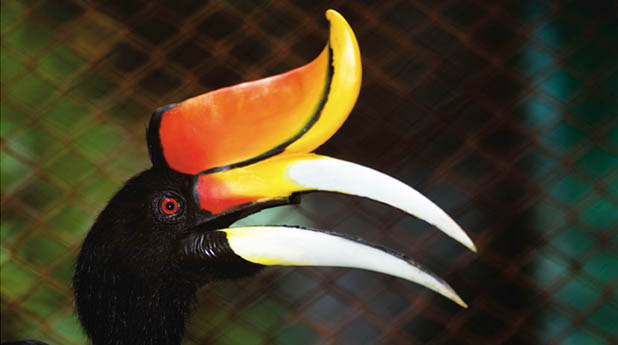
To join our proboscis monkey puppet, and in continuation of our Bornean animal theme, we made a Rhinoceros Hornbill paper craft.


Sarawak, the Malaysian state we visited, is known as the Land of Hornbills. Though we weren't lucky enough to see any real hornbills on our trip to Malaysia, we did see lots of hornbill handicrafts made by native ethnic groups, like these:

a paper hornbill in an Iban longhouse at the Sarawak Cultural Village
a flying hornbill in the Melanau longhouse

For our project, I liked this toucan craft idea of making a colorful picture window for the bird's beak. Since they are fairly similar, it was easy to adapt to a hornbill.

I used this photo of a Rhinoceros Hornbill as a model:


Supplies:
  • green construction paper
  • tacky glue
  • assorted papers, ribbons, feathers in red, orange, yellow and white
  • scissors
  • white cardstock
  • black crayon or paint
  • glue-on eye or button

Step One: Draw outline of Rhinoceros Hornbill. I did this free hand from the photo. Then cut out the beak and "horn." (The sheet in this photo is on a red table).

Step Two: Flip the paper over. On the back, paste on papers, feathers, and ribbons following the general color pattern of the hornbill photo.


Step Three: Flip the paper over. Color the rest of the head black. Paste the eye (or button) on the face.


Your very own Rhinoceros Hornbill!

Saturday, July 23, 2011

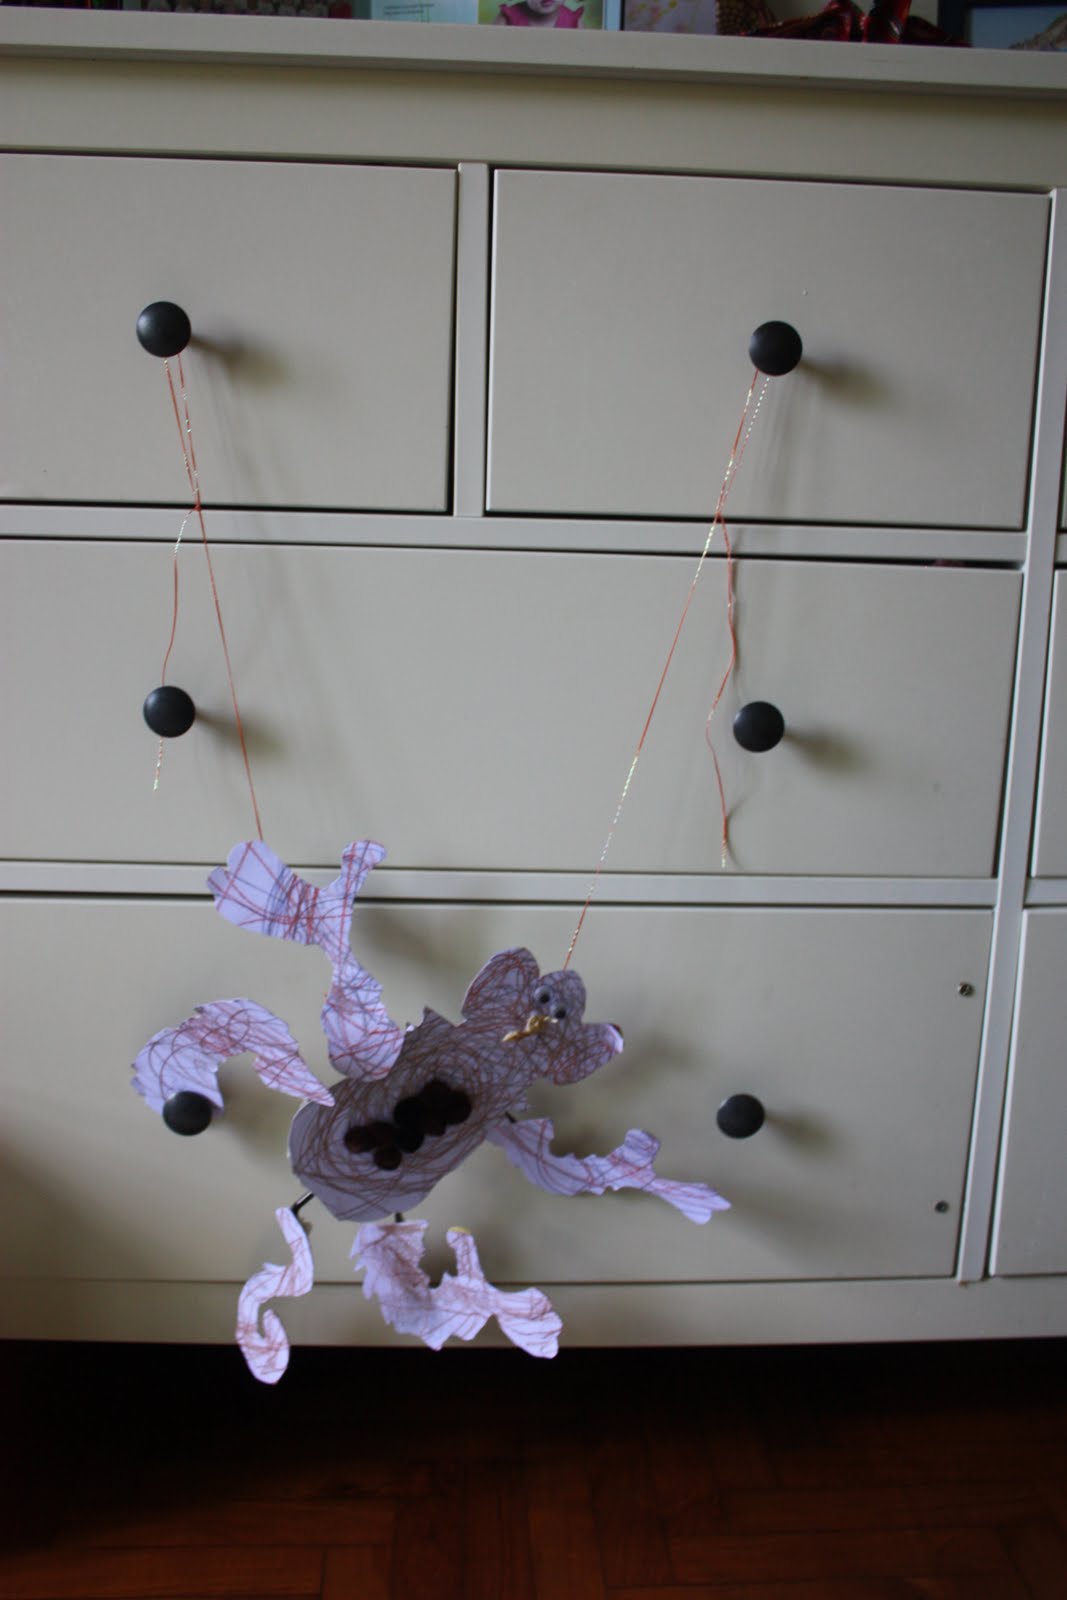
Malaysia crafts: Proboscis Monkey puppet

Time for some crafts inspired by the animals of Malaysian Borneo! One of the biggest highlights was seeing a semi-wild orangutan in the wild, and there's a great paper craft for older kids on this site.

But we chose to focus on our other favorite Bornean primate - the Proboscis Monkey. Mostly because I love hearing the various ways The Whirl Girl says "proboscis." And because Proboscis Monkeys are found only in Borneo and we were lucky enough to see them swinging through the trees of Bako National Park.

Do you know what distinguishes the Proboscis Monkey from their tree-swinging friends? Their BIG noses!


We followed the Monkey Puppet template from the DLTK blog, adding a couple of embellishments of our own, namely a BIG nose.

Supplies:
  • print out of template
  • brown and gray crayons
  • glue stick
  • string
  • masking tape
  • cardboard (we used two cereal boxes and they worked great)
  • 1-2 straws
  • scissors
  • glue-on eyes (optional)
  • colorful cotton balls (optional)
  • raffia (optional)


Step One: Color the monkey parts.
As you can see, coloring precision is NOT necessary. The Whirl Girl did a mix of all different shades of brown and gray. (It looks enough like a monkey once the pieces are cut out).

Step Two: Cut out the pieces (with an inch or two on each side) and glue to the cardboard.


Step Three: After the glue is dry, cut out the monkey parts (with the cardboard).


Step Four: Add embellishments. We added some glue-on eyes...

...brown cotton balls...

and a BIG raffia nose.


Step Five: Attach the pieces to each other. Turn them upside down to lay it out. Use a cut straw to tape the legs, tail and one arm to the body. Use string to attach the remaining arm.

Step Six: Tape a long piece of string to the body and another to the arm that is attached with string. Make a circle/bracelet at the end of the string that isn't attached to the monkey.


And you're done!

This craft was a huge hit with The Whirl Girl, especially since it could do more than hang on the refrigerator. It's a new toy! She showed the Proboscis Monkey all around the house, made it dance, and gave it a lovely spot to hang in her room.