Showing posts with label crafts. Show all posts

Sunday, October 30, 2011

India crafts: India flag

The Whirl Girl's papa jumped into help with this craft, using all sorts of Indian dry foods to make an India flag.  And The Whirl Girl's cousin was here to make one too. 

We had so much fun with the Chinese rainbow rice activity, that we replicated it India-style.  We used red/orange daal (lentils) for the orange, moong daal for the green, white rice for the white, and tea leaves for the blue/black. 


Supplies:
  • white rice
  • orange daal
  • green moong daal
  • tea leaves
  • glue
  • card stock
  • cardboard (optional)
  • clear packing tape (optional)

 Step One: Glue the cardstock to the cardboard.  Draw flag in pencil.  Add glue to wheel.

Step Two: Pour tea leaves on wheel and shake off.

 Step Three: Add glue to the top stripe. 

Step Four: Sprinkle orange daal on top of glue.

 Step Five: Repeat with green daal for the bottom stripe and white rice for the middle. 

 Step Six: Wave your flag!  
(We later covered ours with packing tape so that all of the daals/rice wouldn't fall off).

Monday, October 24, 2011

India crafts: Mehndi Handprints

And we're back!  The Whirl Girl has been joined by a Twirl Guy, now almost two weeks old.  The Whirl Girl is eager for him to join us in our project-making, and I barely have the heart to tell her that it will be a long while before he will be able to do so.  Our crafts and cooking time has been limited but we're forging ahead with a couple more projects for the month.

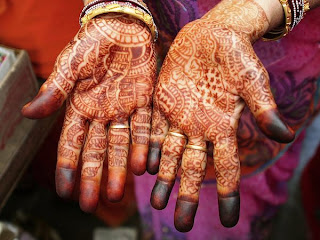
First up is mehndi hand prints.  Mehndi or henna is used to decorate women's hands in India for festive occasions - especially holidays and weddings.  Designs are drawn free-form using a tube of paste made from henna leaves and come in varying degrees of elaborateness.  There are often flower and peacock motifs.

photo from National Geographic
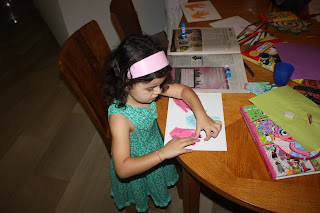
I thought it would be fun for The Whirl Girl to draw her own mehndi designs, so we cut out her own handprints on construction paper and she used colored pencils to color Indian-inspired designs.  I printed out a couple of templates from this site for examples.


My seven-year-old niece is visiting and she made some too.   It was just as much fun for her age group as The Whirl Girl's.


Supplies:
  • cardstock
  • colored construction paper
  • crayons or colored pencils
  • scissors
  • glue
  • templates for inspiration

Step One: Trace handprint on colored paper.  

Step Two: Color in designs on the handprints.

Step Three: Cut out handprints.

Step Four: Glue on to cardstock.

All done!

Sunday, October 16, 2011

India crafts: Paper plate tiger

Time for some animal crafts!  We've made an elephant, a tiger and a peacock puppet out of paper plates, inspired by posts on Activity Village.

Here's the tiger to join his jungle friends.


Supplies:
  • 1 paper plate (we used a small ones)
  • orange and black paint
  • orange paper
  • wooden chopstick or something similar
  • glue-on eyes or black paper
  • cotton ball or black paper (for nose)
  • pipe cleaners

 Step One: Paint the plate orange. 

Step Two: Paint black stripes.

Step Three: Glue ears, eyes, nose and whiskers.


Step Four: Tape chopstick to make a puppet.

Thursday, October 13, 2011

India crafts: Paper plate peacock

Time for some animal crafts!  We've made an elephant, a tiger and a peacock puppet out of paper plates, inspired by posts on Activity Village.  Of the three, the peacock is probably the most work.


Supplies:
  • 2 paper plates (we used a small ones)
  • blue/turquoise/green paint
  • green/blue paper
  • wooden chopstick or something similar
  • glue-on eyes or black paper (we used beads)
  • decorations (optional) - we used cut up pieces of sparkly fabric and ribbons

Step One: Paint the plates turquoise.   
 
Step Two: Glue the plates together to make head and body.

Step Three: Cut out paper feathers.  We had 8 feathers, from 2 sheets of paper.

Step Four: Decorate the feathers.  


Step Five: Glue feathers to the body/head.

Step Six: Add eyes, nose and whatever else you're in the mood for.  (The Whirl Girl wanted her peacock to have a necklace).  Tape on stick to the back to make it a puppet. 

Introduce to your other Indian jungle friends.


Tuesday, October 11, 2011

India crafts: Paper plate elephant

Time for some animal crafts!  We're venturing into the Indian jungle to make an elephant, a tiger and a peacock puppet out of paper plates, inspired by posts on Activity Village.  We tried to do all of them on a rainy morning, which I wouldn't really recommend.  The Whirl Girl loves her projects and even by the end of it, she was sick of them and ready to just play.  But individually, they shouldn't be too much work. 


First up, an elephant.  You can tell that she's Indian because she's all decorate like elephants in India often are.  Like this one (photo from National Geographic):


Supplies:
  • paper plate (we used a small one)
  • gray (or black and white) paint
  • gray paper
  • wooden chopstick or something similar
  • glue-on eyes or black paper
  • decorations (optional)

 Step One: Paint the plate gray.  

Step Two: Add decorations.  We cut out paper and ribbons that I had. 

Step Three: Glue on trunk and eyes. 


Step Four: Glue on ears.  The Whirl Girl decided these needed some decoration too, this time with crayons.


Step Five: Attach chopstick to the back to make it a puppet.

 Introduce to other Indian jungle friends.  

Sunday, October 9, 2011

India crafts: Flower Rangoli


Rangoli is a colorful design, often geometric.  It is usually done on the floor or courtyard of a home, using rice, grain or flour, or some kind of colored powder.  It's prominent during festival seasons in India, especially for Diwali.  It is used to welcome guests and gods/goddesses into the home.   You can find great examples of the variety of designs on this Diwali site. And Activity Village has a fantastic rangoli page with all sorts of ideas and printable outlines.

We used flowers to make our rangoli and we did it two ways: one indoor and one outdoors.

In Little India, there are street vendors selling flowers for puja (prayer ceremonies).  For a mere $2, we got a huge pile of jasmine, marigolds, roses, and orchids.  And between our indoor and outdoor crafts, we read Lily's Garden of India, one of our books for the month, which features Indian plants and flowers (including some of the ones we used). 


Supplies:
  •  printouts of rangoli designs like these
  • colorful flowers
  • glue (for indoor rangoli)
  • sidewalk chalk (for outdoor rangoli)


Indoor Rangoli

Step One: Pull the petals off the flowers and keep them in bowls sorted by color.  

Step Two: Put glue on one part of the rangoli design (I did this) and sprinkle flowers on top (The Whirl Girl did this). 

 Repeat with another design!

 Outdoor Rangoli

Step One: Draw a rangoli design.  I did some of the big shapes and The Whirl Girl added her own designs.

Step Two: Fill in with flowers.

Voila!  We were joined by some friends in the neighborhood, making it double the fun.  We'll probably make some more around Diwali time and invite more kids to join us.